Oh no…. not another hamburger button. Yep. I’m afraid so. Would you like fries with that today?
Hamburger buttons are ubiquitous on the web, right? Why not add some fancy condiments to yours? Maybe some handwriting? Or perhaps a little curved path for the lines to follow? In this quick tutorial for an animated hamburger button, I’ll show you both.
Make a path for your buns
Yes, I said buns. Now you’re laughing, aren’t you?
A typical burger button is usually three horizontal lines. When clicked, the top and bottom rotate to make an “X” and the middle one generally disappears. Okay, that’s fine and gets the job done, but let’s add a bit more style.
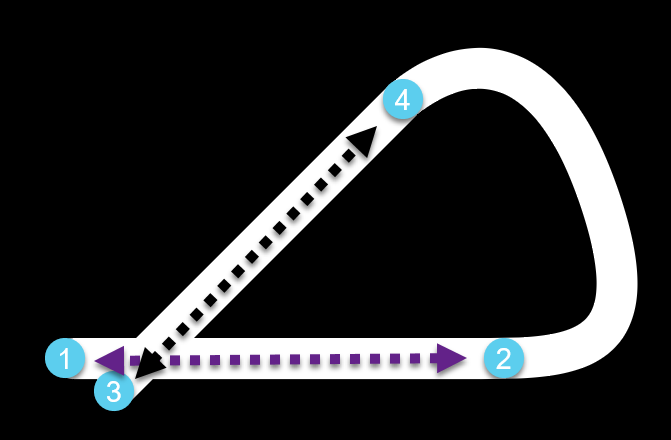
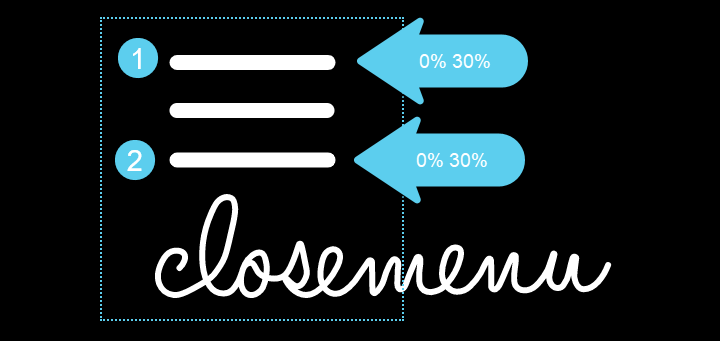
I’m not going into great detail about the vector creation on this one, but the general layout is like figure 1. Your normal bottom line is in the #1 → #2 position. When rotated, it’s in the #3 → #4 position. To build this effect, create a path in both positions. Then, draw a curve of your choosing from position #4 to position #2.
After that, merge the three into a compound path. You now have the motion path for the bottom piece.
Make a duplicate
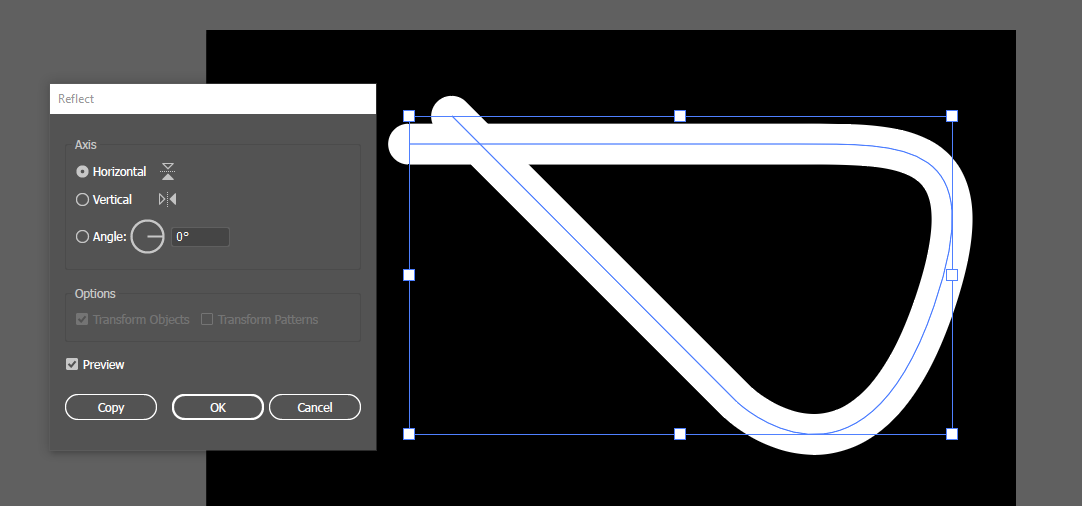
Do you need to create another path for the top piece? Nope. Just use the reflect tool in Adobe Illustrator to create a horizontal copy. (figure 2)
The handwriting
For the handwriting, we need an open path to spell out “closemenu”. This tutorial is not going into detail about how to create handwriting. For that, check out my post: Animated Handwriting Effect Part 1.
When we add the open path to the menu button, we’ll only be showing a portion of it-either “open” or “close”. For now, here’s the whole path animating with GreenSock’s DrawSVG plugin. Note: I’ve used a longer duration and no ease so you can better see what it’s actually doing.
See the Pen Menu Handwriting by Craig Roblewsky (@PointC) on CodePen.
All the pieces together
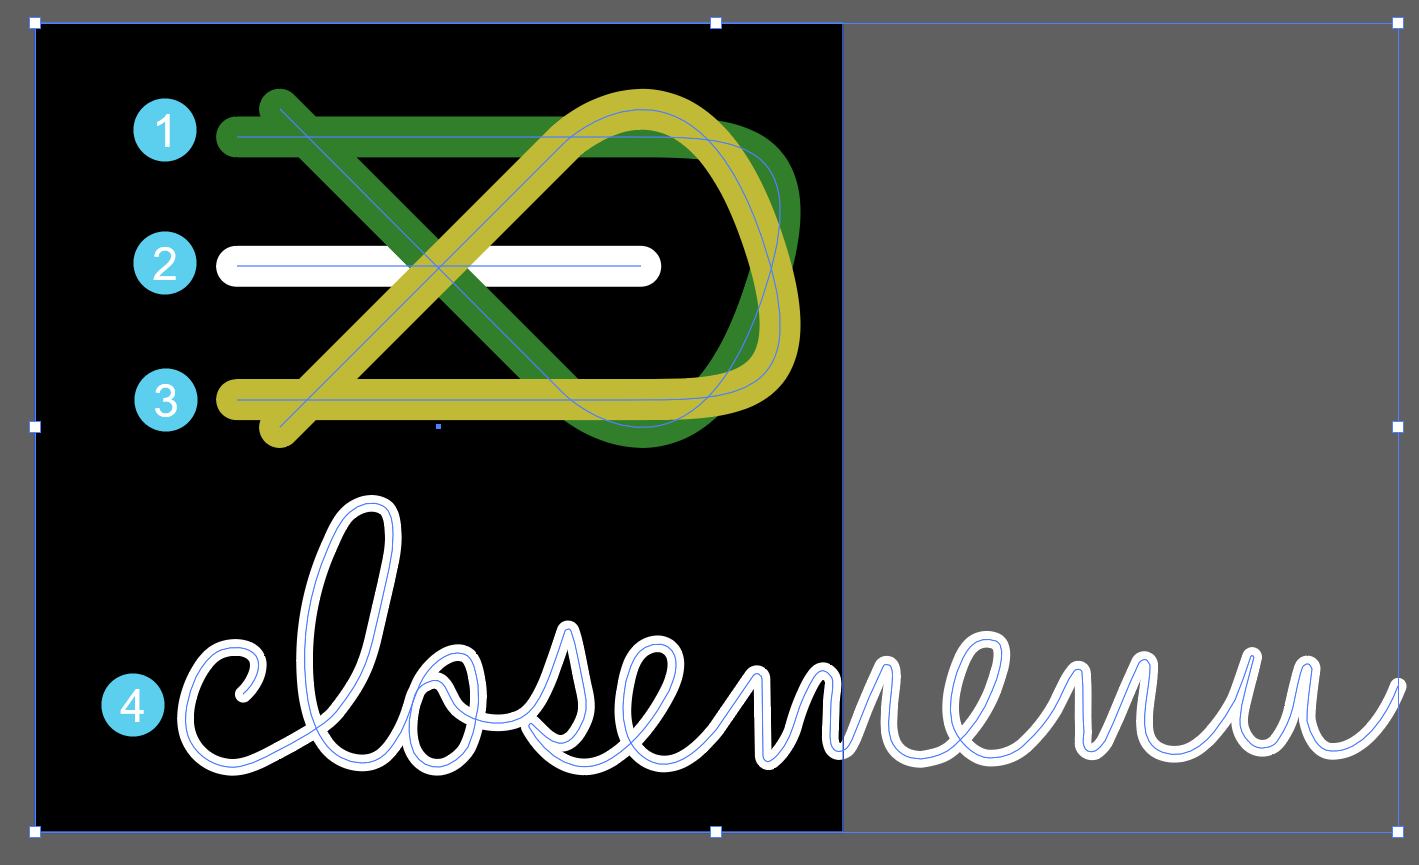
Once we drop in the handwriting path and put it all together, you can see the result in figure 3. #1 (green) is the motion path for the top piece. #3 (yellow) is the bottom motion path. #2 is the normal middle patty. See how the motion paths and the middle patty piece all form a nice “X”?
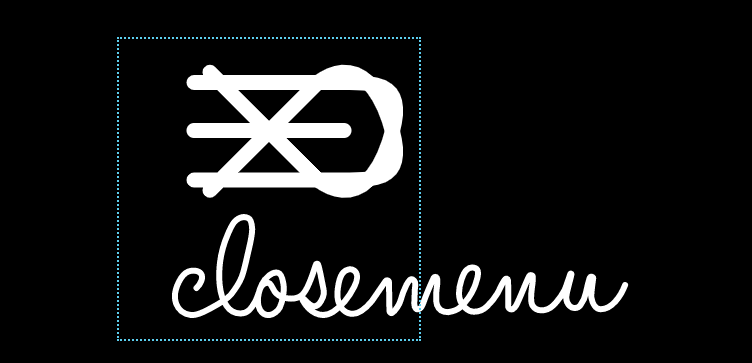
The black rectangle is 100 x 100 as that’s the size I want for my SVG button. However, because of the position of the handwriting, the output viewBox won’t be correct. We can change that once we export and start coding.
The buns setup
When we add the SVG, we get the result of figure 4. All 3 open paths (2 buns, 1 handwriting) and the patty line are at full length. I’ve outlined the SVG in the image so you can more easily see the layout.
The GSAP setup code
I’m using the DrawSVG plugin from GreenSock. This plugin animates the stroke either with a numeric value or a percentage. The two buns paths only need to show the first part of the path when the button is in the closed state.
gsap.set(".buns", { drawSVG: "0% 30%" });
The above code tells the plugin “Hey, show the path from 0% to 30%.” How do you arrive at 30%? I’ll be honest. I didn’t measure anything. I just eyeballed it and it looked like approximately one-third needed to show. I thought that was a bit long, so I tinkered with the numbers a bit.
So, the whole path is still there. We just show the first 30%.
The letters setup
The letters path is pretty much the same as the buns paths. We only want to show a segment of it. In this case, we want to show “menu” when the button is in the closed state but that won’t quite get us what we want. We also need to move that path along the x axis while the handwriting animates. An x distance of -155 seems to do the trick.
To do that, we need a setup like this:
gsap.set(".letters", { drawSVG: "53.5% 100%", x: -155 });
We’re telling the DrawSVG plugin to show us the handwriting path from 53% to 100%. In this case, that shows the word menu. Again, I just eyeballed this. Sometimes, that’s quicker than trying to measure everything.
Now that we have everything in the starting position, it’s time to animate on click. We add an event listener and use the following timeline.
const tl = gsap.timeline({ defaults: { ease: "power2.inOut" } });
tl.to(".patty", { duration: 0.35, drawSVG: "50% 50%"}, 0);
tl.to(".patty", { duration: 0.1, opacity: 0, ease: "none" }, 0.25);
tl.to(".buns", { duration: 0.85, drawSVG: "69% 96.5%" }, 0);
tl.to(".letters", { duration: 0.85, drawSVG: "0% 53%", x: 0 }, 0);
tl.reversed(true);
The first two tweens animate the center patty (just a line) to a length of 0 and then, fade it out of view. The buns tween animates the stroke from where we started (0% 30%) to 69% 96.5%. The letters are animating their stroke backwards to show “close” and we’re animating along the x axis back to 0. Remember, we started at -155.
Putting that all together, you get the following result.
See the Pen Hamburger menu button w/handwriting effect (GSAP 3) by Craig Roblewsky (@PointC) on CodePen.
Final thoughts
You may be wondering why I created the handwriting path to say “closemenu” instead of “menuclose”. The answer is simple. It was easier to write from the e → m over the u → c. You could certainly create it the other way though. You’d just need to adjust your DrawSVG start and animation points for that path as well as the x axis position.
Well, we’re at the end of another tutorial. I hope you learned something or at least laughed, since we talked a lot about buns. Until next time, keep your pixels movin’.


